8/24/2000
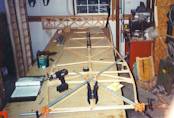 |
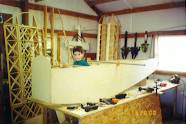
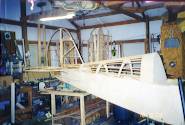
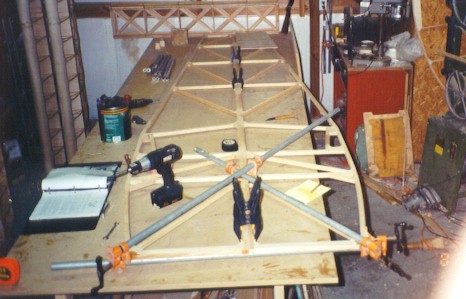
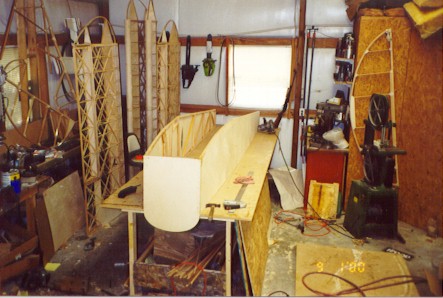
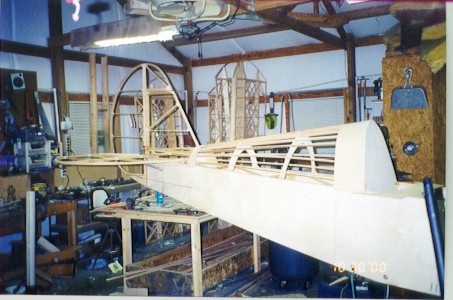
Today I finally started the long awaited fuselage construction.
Due to long storage, several joints with out the support of gusset ply
have let go. I thus have the two sides jigged together to secure these
two areas. Application of the side ply will take almost all stresses
off these areas. |
1 |
8/28/2000
 |
Fuselage sides were checked over for any flaws or
breaks. Side ply was pulled from box and inspected and the Strapping
tape was removed. That stuff just don't want to come off! Pieces
were aligned with the side trusses and the members were traced onto the
ply to help align the sheets to the truss and then apply staples during
curing. |
1 |
| 8/29/2000 |
Further inspections and trimming of the fuse truss
were made to assure a good flat surface to glue the sides to. Epoxy
was mixed and the forward ply section of the right side was glued and stapled
in place. Once dry the staples were removed. Next section tomorrow.
This is taking more time and epoxy than I had first imagined. |
1 |
| 8/30/2000 |
Starting at 0730 today, I after 2 hours have completed
gluing the side ply in place on both fuse trusses. Now is time to
read and figure out the next step. Things are getting critical.
Drawing the outline of the lower wing rib on the ply, I am reminded that
the positioning of the lower wing as per plans is causing the flying wires
from the gear attach channel to contact the leading edge as they stretch
to the upper wings. Mainly the back wire. Time for a consult.
. . . Got other troubles with the lower wing incidence I'm trying to get
worked out before I do anything I can't undo! |
2 |
| 8/31/2000 |
Today was spent getting answers. Questions
were, were Do I put the wings!? Conflicting information on the plans
and manual so I ended up going to the source, Mike Fisher. After
looking through his notes he came up with good answers. That
means were back in business! Outlines of lower root ribs are now
on the fuse sides and we can now start mixing more glue for the fuse! |
0 |
9/1/2000
 |
Prepared the fuse sides for joining today.
Cut several cross members for stations 3 through 5 as per plans. I glued
the firewall to the sides with the remainder of the sides clamped into
position for later gluing. I think Ill just let it set as is to relax
till I get back. . |
1 |
9/18/2000
 |
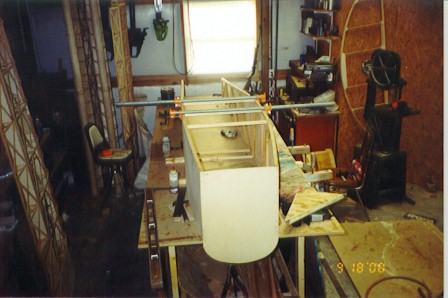
Spending quite a bit of time just trying to see
if the thing is square and plumb before I start mixing glue to do something
permanent. My squares seem to be lying to me, so I've gone to my
levels to check against vertical. Fashioned some triangles out of
the crate lid and have attached them to the table to give me a square reference.
Things quickly came together after that. Stations 2, 3, 4, and 5
are now square and glued in the clamps. The rudder post will be trimmed
and joined at the next work period. |
2 |
9/19/2000
 |
Spent much time today preparing remaining cross
members, diagonals, and tail post joining. Many questions arose studying
the plans, so time was spent on the phone with the FFP people today.
Next challenging thing will be the cutting and installation of the millions
of gusset blocks. Today I've installed about 6. I don't believe this
even scratches the surface. |
3 |
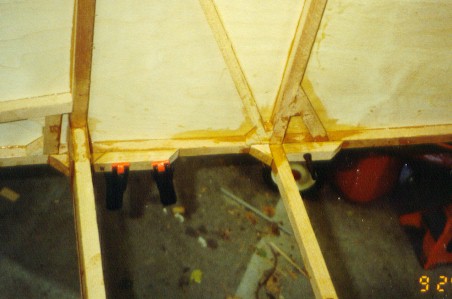
| 9/20/2000 |
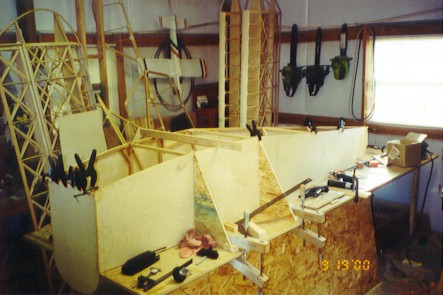
If I ever see another gusset block it will be too
soon. Having said that, I'm just less than half way done with them.
Most of the bottom cross members and diagonals have been blocked, and have
the gusset ply in place. I've chose not to install the outer floor
skin till after rigging the wings to allow access to the aft spar carry
though spar. Ply doublers at firewall were also installed.
Time was spent cleaning up glue drips, especially around gusseted areas
that will receive ply gusset plates. Tomorrow, will be spent installing
the gusset blocks on the top side of the fuselage, as well as the further
firewall installations. Lots of work taking place, but seemingly
no progress when you step back. Details!? |
4 |
| 9/21/2000 |
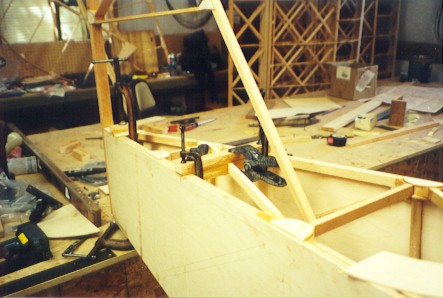
Busy work at this point. I'd say at this point
I'm about 95% complete with the gusset blocks. It seems every time
I turn around another empty corner pops up in need of a block. Tail
wheel ply gussets were glued in place, as was the upper gusset block.
Ply doublers will follow tomorrow, for upper tail gusset block as well
as the other myriad of corners. Upper longerons were checked for
plane. I'm either lucky or good. That is one flat surface!
Should make the rigging a bunch easier in the future. |
2 |
9/22/2000
 |
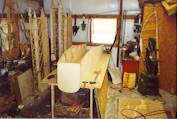
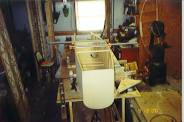
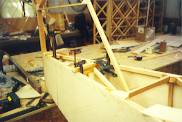
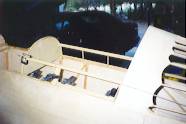
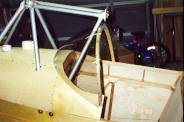
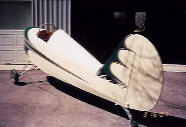
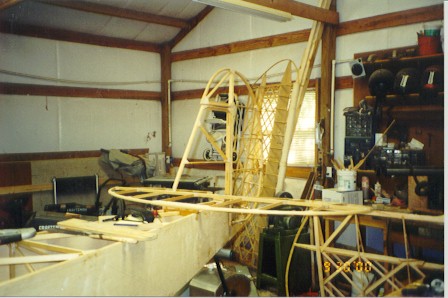
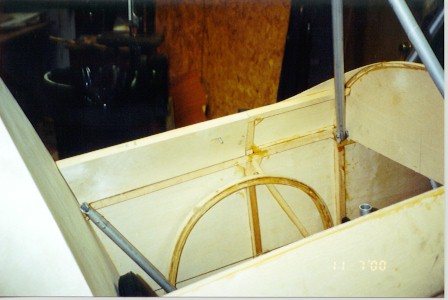
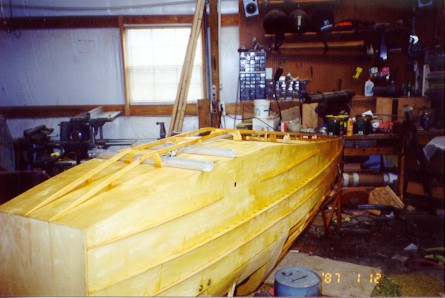
All but about 4 gusset blocks, and about half of
the 1/8" gusset plates are left at the basic "canoe" stage of this project.
I pulled it off the table and stood it in the corner today to start on
the gear as you see below. It seemed that everything I wanted to
do today required the wings to be fitted, so I guess I'll spend some time
doing the metal work so I can get an initial rigging to allow placement
of the aft spar carry trough |
1 |
| 9/23/2000 |
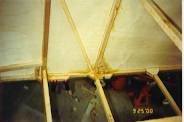
Details! Placed, main spar carry through and
it's gussets. Installed doublers at seat belt attach points.
Final doubler at top side of tail post also installed. If I don't
run out of glue, I should have the outer floor on by monday noon. |
2 |
9/24/2000
 |
Sunday's don't have much time for hobbies, but I
did manage to get one glue mix in today. With that mix, I've finished
all the gusset plates, and corner blocks that can be done until the installation
of the trailing spar carry through. Cross member at stabilizer leading
edge was fashioned and installed also. Ply doublers for this will
be installed at the next work period. Seat back bulkhead ply was
cut to shape, as were shims to properly mate it to cross members at station
4. Outer ply floor was also prepared for installation also.
Busy gluing day tomorrow |
2 |
9/25/2000
 |
Well today's goals were met, as to the seat back
and floor. I broke down and actually did some mods to the lower longerons
where the bolts will be passing through the longerons. The stabilizer
cross member was checked today and found 3/4" aft of needed location, so
it was removed and replace along with it's sandwich of ply and top 3/4"
spacer all in one glue up. Hoping to work for seat bottom installation
tomorrow so I can sit in it and make airplane noises! |
2 |
| 9/27/2000 |
All things are starting to fall together.
It seems that every thing, is depending on the completion of another.
Seat installation was attempted as per plans, (after all if it is on the
gear you need to be able to sit in it and make airplane noises) and there
is no way on earth that it could be done as drawn. Quite the optical
illusion to be sure. So, being a bit taller than Mike Fisher, I worked
out my own seat supports, and will soon find a suitable plank for the seat
itself. I guess I'm going to have to brake down and mount the lower
wings so I can finish the flight controls. |
1 |
| 9/28/2000 |
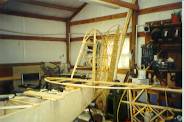
Finally got around to hooking up the wings to align
the aft carry through spar. This done, the spar was shaped, and installed
with the vertical side member at station 5. Cornerblocks, and diagonal
are the order of tomorrow. Stabilizer was also squared and drilled
for 3/16" bolts. Fin will hopefully be installed tomorrow |
2 |
9/29/2000
 |
Being very short on glue, I spent the day cutting
out all the parts that are to be installed after the aft carry through
spar. Verticals, diagonals, gusset blocks etc. . .. A board was found
that could serve as a seat plank was formed. About 50 little pieces
have been cut to go in as soon as the order of glue arrives. Sticky
hands day! Last item of the day, I did square and glue the fin in
place at the tail post. |
3 |
| 9/30/2000 |
Very little done on the Fuse woodwork today.
Just trimmed leading edge of the fin to meet last bulkhead of the turtle
deck. |
1 |
| 10/5/2000 |
With new glue in hand, I mounted all the parts that
were fashioned the 29th were glued in place. Only a few corner blocks
and gusset plates remain outside the turtle deck itself. |
2 |
| 10/9/2000 |
Deciding not to use the 3/8" yellow pine plywood
that mike provided as a floor board, I created a replacement today for
the same purpose. I would hope it would be stronger, lighter, and
with out doubt, better looking! Made of aircraft, mahogany ply, with
a doubler where the rudder peddles will attach. Ought to look nice
with the contrast lighter wood back ground floor. They will
be secured to the floor just as Mike intended for the original. |
1 |
10/10/2000
 |
Today's efforts were mainly in the continued clean
up of little items. A few gusset blocks, and the construction of
the farthest aft turtle deck bulkhead that supports the fin leading edge.
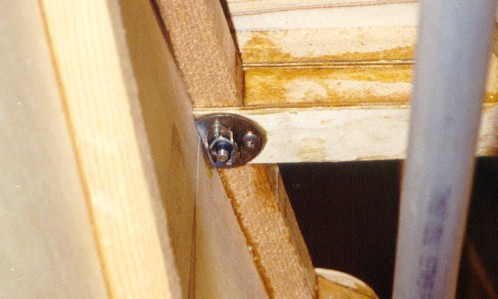
Permanent mounting of the stabilizer was also accomplished today.
To this end, I mounted anchor nuts onto the large 3/16" washers. This assembly
was then mounted to the bottom of the longeron with epoxy, and a number
#6 screw or two. Should simplify the whole installation, and fabric
work, not having to access under the stab. for mounting and removal.
Same installation will be done on the tail wheel back plate also. |
1 |
| 10/12/2000 |
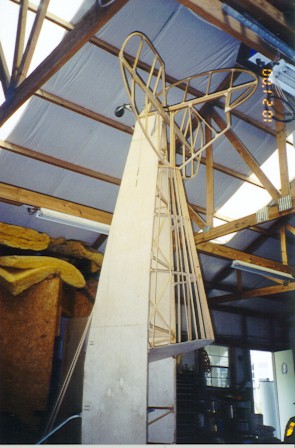
Finally glued in place the aft turtledeck former,
and mounted the fin leading edge to it. It appears to be solid and
true to the fuselage centerline. Lower fin rib was also fashioned
and installed. Time was spent placing the other two formers for the
deck, and chalk lines were snapped where stringers will be added soon.
Further study of the rudder cable routing was made, and holes drilled in
the seat back bulkhead, at the point they pass. |
2 |
| 10/13/2000 |
A day of backing up, and interruptions!?
After doing the fine rib work at the base of the fin, I see that the rib
will block the insertion of the aft Stabilizer AN-3! Had to remove
the two glued in screws, and the large washer with the anchor nut attached,
and go to two AN-3's, inserted through each upper longeron. It's strong,
but I wished I had not placed the bolt where it was called out in the plans!
All 1/4" gusset pieces that hold the stringers in place on the forward
and aft bulkhead of the turtle deck were glued in position. The two
mid formers were cut out to receive the stringers, stringers were then
glued in place after much checking of alignment. Should be able to
attach the ply around the aft and forward turtle deck bulkhead tomorrow.
On the brighter side, it is really starting to look like a Youngster! |
3 |
10/14/2000
 |
Not much done here, Cleaned up the turtledeck
stringers and glue joints. Trimmed bulkheads to prevent contact with
fabric when covered. Ply wrap for each end of turtle deck was also
trimmed, may be glued tomorrow. |
1 |
| 10/20/2000 |
Landing gear was removed and wedges fashioned
to give flat surface for bolt heads and the gear channels to rest on. |
2 |
| 10/28/2000 |
Worked a bit on the seat belts today.
Got the lap belts in place, but will have to study on the shoulder harness
installation. Will probably mount them at shoulder height, in conjunction
with a hatch to access lower rear spar attach fittings. |
1 |
10/30/2000
 |
Glue day! Glued the wraps on at both ends
of the turtle deck stringers. Glued support brackets for elevator pushrod
guides. Glued ply doublers at diagonal brace ends, one gear
diagonal on fuselage side, and stabilizer at flying wire attach point.
Laminated up the bows that will attach to aft of firewall, and instrument
panel. considering location and shape of hatch to access behind seat
to bolt wing attach fittings. Why am I dreading and avoiding the
stringer installation so much? |
4 |
10/31/2000
 |
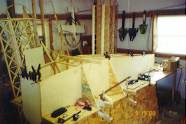
Trimmed scallops into turtle deck ply at each end.
Also spent time framing up the cockpit sides. I have moved the step
on the wing, as did I the door to the cockpit to the left side of the fuse.
I have framed up the entire left side, and left enough gap to, with a razor
saw, remove the door in one piece once I have the outer skin on it.
I have done this to prevent any deformation, trying to assemble it away
from the airframe. The bow for the canopy was also laminated.
Bows for the back of the firewall and instrument panel were also attached
in their appropriate positions. |
4 |
| 11/1/2000 |
Today ended the fourth month of work on my Youngster!?
Kind of hard to tell just how much longer it will be before I can call
it complete. Today's efforts included adding plywood to the cockpit
side frames, and door. The door was removed and trimmed. The
latching mechanism was fashioned as per plans. Interior of the door
will be varnished in the morning, then the inner door skin will be applied.
Bushings for the cabane attach bolts were also made and installed.
Canopy bow was removed from jig and trimmed. This looks like it will
be a challenge. Cabanes were put in place to study this application |
5 |
11/6/2000
 |
The inner skin of the door was glued in place and
operation of the spring latch was checked. A bushing was also fashioned
for where the latch pin leaves the door. Need to find a hinge
for the door next. |
1 |
| 11/7/2000 |
Excess ply was trimmed from door. Latch pin
was cut to length, and tapered to ease latch. 1/4 id bushing stock
was cut and glued into cockpit side vertical to allow smooth operation,
and positive latch for door. Stabilizer, elevator, rudder, and tailwheel/spring
assembly was removed to allow leveling for wing rigging. |
1 |
| 11/11/2000 |
Turtle deck was cut out to allow passage of shoulder
harness, and access to lower wing spar attach fittings. Cable was fashioned
to connect shoulder harness to back plate of Tail wheel attach point.
Turtle deck opening will be reinforced later to take the load of the shoulder
harness, and hinge for opening cover. Stabilizer was bolted into
position for the installation of its flying struts. After consideration,
I will prepare the mounts, and drill their attach bolts, but will
hold off cutting and drilling the struts themselves until I have the aircraft
covered and painted. I figure that even the thickness of the fabric
and paint could cause a difference in the length required. Hope I
don't regret this. . . . . |
2 |
11/13/2000
 |
Gusset ply was placed at the top longeron on the
left side at the aft end where the small door starts. This was placed
to stiffen the small stub wall. The cut out at the forward end of
the rear turtle deck was sanded and shaped for symmetry, and support
wood was glued at its base to not only mount hinges, but to also to support
the shoulder harness straps. A door "jamb" was also cut and glued
to the aft side of this bulkhead. This to prevent the door from swinging
through, and stiffen the area from where the door was cut. All the mount
tabs for the stabilizer flying struts were cut and shaped today. |
2 |
| 11/20/2000 |
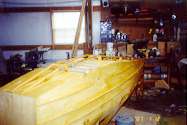
Pulled off the wings today to start the final aesthetic
work on the airframe before the varnish is applied. Stringers for
the fuse sides were selected, and those conflicting with the lower wing
were trimmed as per plans. Aft carry through spar was also drilled
out to final 3/8" to accept bushings. Canopy bow was also soaked,
again, to try to spread it a bit to better fit the present cockpit shape.
Instrument panel was trimmed to fit altimeter, and holes drilled to mount
it, and the CHT/EGT gauge. |
3 |
| 11/21/2000 |
All fuselage side stringers were glued in place.
Once dry, I'll hand plane and sand them to shape. Looks kind of crude
at present. The canopy bow was also trimmed to final shape and temporarily
screwed into place to confirm placement. Study was made of the installation
of the canopy bubble, and is obvious as is, it will not fit the bow or
this airplane. If inverted, I may be able to make it work, but will
see if the aesthetics will work. Study was also made of the front
turtle deck installation. Much measurement was made, and thought
before cutting material. Cross member at aft end of seat bottom,
was drilled with lightening holes, and will be glued in at first opportunity. |
3 |
11/24/2000
 |
Today was spent with a block plane in my hand shaping
the front and back ends of the side fuse stringers. A couple needed
some repair from breakage from removing staples that held them in place.
I also glued in the cross brace that supports the aft end of the seat bottom.
One piece of the front turtle deck was also cut to size and installed onto
the left side of the nose. I'll wait to continue this battle till
after I get the fuel tank installed. |
2 |
| 11/26/2000 |
Just spent an hour today with the airplane.
Using the material supplied, I created a tank mounting strap system.
Really does hold the tank firmly in position! Now comes the plumbing work! |
1 |
11/29/2000
 |
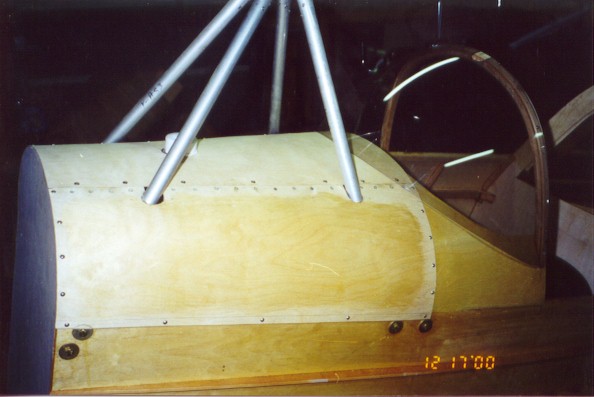
Today's efforts involved fashioning the forward
turtle deck that covers the tank. The cover involves 2 pieces that
will attach to the fuse sides, and a third that joins them in the middle
that is inserted between the cabanes. A aluminum strip was mounted
with rivets and glue to the outer two pieces. Tinnerman anchor nuts and
screws will attach the center piece to them. An attempt was made
to attach the canopy wind screen supplied with the kit today. Whichever
way it was turned, there was no way it would fit the aircraft that was,
by the way, built to plans. Considering either making a replacement
from the material supplied to be used for the wrap around canopy enclosure.
I'll check with Gene At FFP for recommendations. |
3 |
| 12/3/2000 |
Tinnerman anchor nuts were riveted to the aluminum
strips on the side pieces of the forward turtle deck. Pieces were
reassembled on the fuselage and alignment checked ok. Only remaining
items are the belly stringers and windshield. |
1 |
| 12/4/2000 |
Rode the orbital palm sander today. Sanded
all the stringers of the turtle deck and sides. Gaps and divots were
filled with regular body putty mixed with glass balloons to save weight.
After well dried, it will be lightly sanded or steel wooled, especially
on areas that will be in contact with the fabric. All detachable parts
on the fuse are being removed for the covering and painting process. |
3 |
12/9/2000
 |
A short time was spent today mounting the instrument
panel. Mounted with two #6 tennerman anchor nut plates and screws. |
1 |
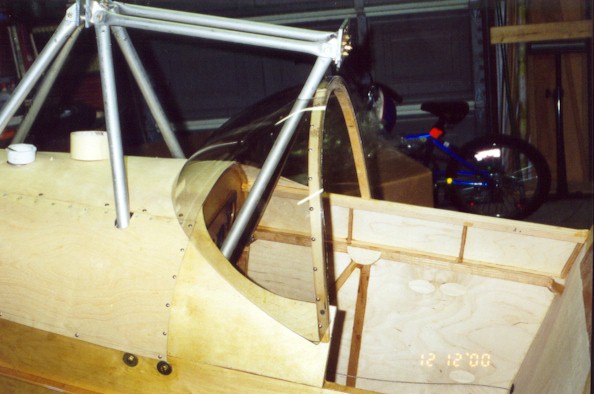
12/12/2000
 |
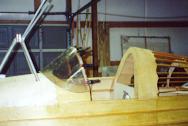
Got four canopies in today and took out a couple
of hours to install one of them. I first installed the bubble wind
screen, and will fit a wrap around screen tomorrow. Installation
obviously went real quickly. It's amazing what happens when you have
something big enough to do the job. I'll fit all four screens and
return one of each type to the Airplane Plastics Company to be used as
a pattern for those desiring to buy one from them, or FFP in the future.
I should have good pictures of each on line with in the next week or so.
Close
up |
2 |
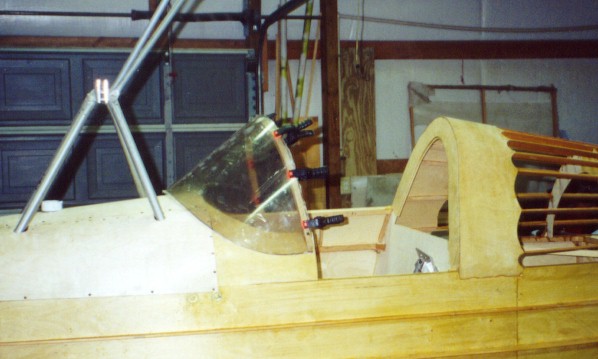
12/13/2000
 |
Spent an hour cutting and shaping the wraparound
canopy. Final cutouts for the cabane struts were not done at this
time. Maybe next chance I get. Reasoning, is that I will probably
fly first with the bubble screen first. Canopy bow was glued in place. |
2 |
| 12/21/2000 |
The engine mount was positioned on the firewall
today. The four mounting holes were drilled to the backup plates
could be installed at the next work period. Guides were fashioned
for where the shoulder harnesses pass though the seat back area. This will
hold them in place so they won't bind the door. Another set of canopies
were fitted, both bubble and wrap around. These will be shipped back
to Airplane Plastics to be used as a pattern for others requiring a canopy
for a Youngster. |
2 |
| 12/22/2000 |
Pretty much stripped everything off the airframe
that didn't need to be in place for the covering process. This also
allowed access to the back of the firewall to install bracing for motor
mount bolts. Main spar carry through attach points were drilled
to 3/8" and bushings installed. Only the belly stringers remain to
be glued in place. Is there light in that there tunnel!? |
3 |
| 1/20/2001 |
Well things have calmed down enough to walk back
to the garage again! Been too long for the project to sit idle. Been
so long it took me a while to figure out just where I needed to start in
again! Need to get back to making lists I guess. Anyway, today's
activities included, rolling the fuse onto its back to facilitate installing
the belly stringers from the lower aft carry through spar, and installing
the rudder control horn in it's permanent position. Maybe some more
stringer work tomorrow and covering the rudder. |
3 |
| 1/22/2001 |
Landing gear legs were removed and final
mounting bolts were installed into mounting channels. remaining stringers
were fashioned and installed to belly. Further shaping of fuse bottom
sides to smooth fabric transition at corners. Work is slow due to
the lower temperatures in working area. |
2 |
1/23/2001
 |
Belly stringers were shaped
and sanded early today. They were then given a good coat of
Varnish. |
1 |
| 2/19/2001 |
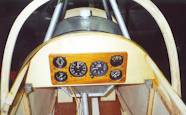
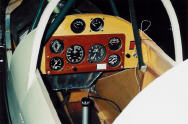
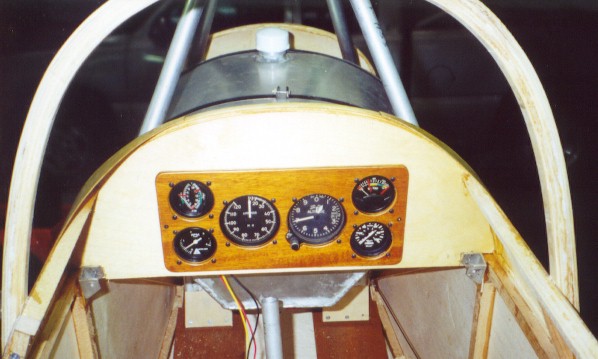
Remounted the instrument panel today.
All switches and fuse holders were also mounted. Volt and hour meters
were also located above the main panel. 12 volt wiring for the gauges
and switches was installed. A separate switch and fuse was installed
to allow isolation of the tachometer if a short occurs or is suspected. |
3 |
| 4/5/2001 |
Finally broke down and created the fairings
that cover the joint between the Fin, and Stabilizer. Rather time
consuming, for such a little part of the airplane. Final shaping
of the firewall stainless steel was also done. |
4 |
| 4/7/2001 |
Removed all the junk from the inside of the
cockpit and cleaned, dusted and vacuumed everything out. Installed
the "Experimental" placard to the right inside wall. Also mounted
the documents folder and fuel gauge. Hobbs meter was moved to the
left side of the panel. |
1 |
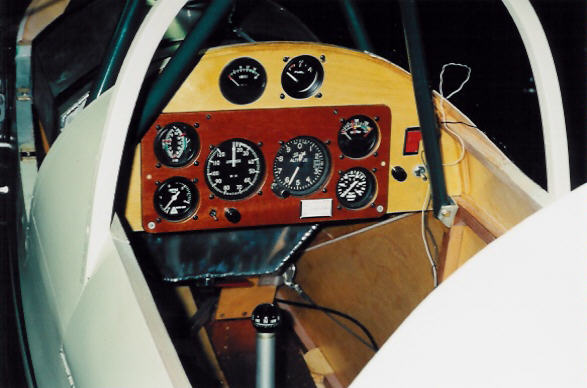
| 4/12/2001 |
Sitting in the cockpit, I noticed that a few
of the instruments dials were obscured by the thick wood panel. to
remedy this I slanted the panel up for a more direct eye line. Wires
behind the panel were bundled into a single harness. Sensitive wires
and self powered gauges will have their wires run separately to prevent
ignition noise from corrupting readings. |
1 |
| 4/24/2001 |
Finally got the fuel probe in today, and installed
it in the bottom of the tank. I guess I should leak check and calibrate
before I install the tank in the fuselage. |
1 |
4/25/2001
 |
The tank was leveled and filled with fuel
today for leak check and fuel gauge calibration. Several significant
items here. First, the Instrument panel was for the first time powered
up! No sparks, no smoke! Before filling the tank, I set the
gauge to read as close to zero as possible. And again set it to read
full when the tank was full. since the probe is about 2 inches shorter
than the tank is deep, the top two inches will just indicate full.
But "E" will have to be given a huge measure of respect! The tank
was then secured in place on the fuselage. All wiring to the tank
was attached and tied in place. |
2 |


