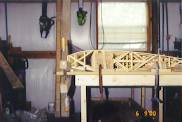
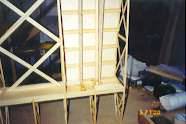
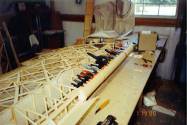
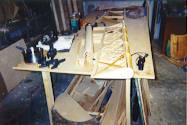
The kit crate was opened, and parts pertaining
to the wing construction were removed and placed on the table for inspection
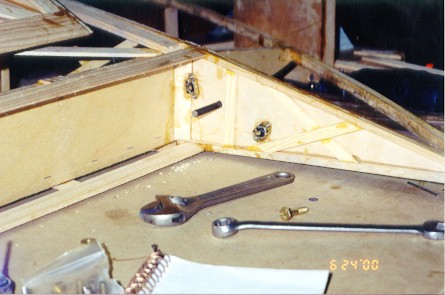
and logistics planning. Errors were found in the blocks installed
at the wing root, attach fittings. An additional block was fashioned
and installed to correct the problem. Other Shims were created to
properly space the interplane strut, and flying wire attach fittings.
Other called out spacer material in plans are not included, but will be
made by stacking 1/8" ply material. The goal for tomorrow!
| 6/2/2000 |
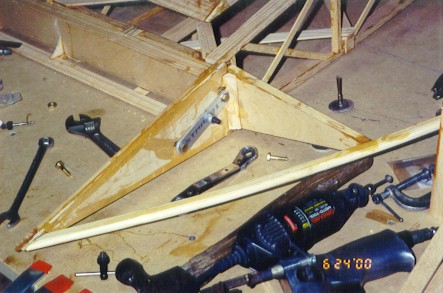
Today all shims were created for interplane strut, and flying wire,
attach fittings at mid spar. Parts were created from 1/16" and 1/8"
ply, and glued in place according to plans. Geometry of fittings
were laid out for drilling. Spar root blocks were made of scrap wood
as per plans.
Tomorrow's goal, is to drill all fittings,
drill all spars to accept bushings, and cut all bushings to size.
If all goes well, have them glued in place! |
5 |
| 6/3/2000 |
All but three fittings were successfully placed and drilled.
With four exceptions, holes were drilled to the 1/4" size only. Time
for drilling oversize holes for bushings ran out. One spar root fitting
will need to be replaced.
Tomorrow's goals are to finish the fittings, and
cut all the needed bushings |
5 |
| 6/4/2000 |
After another approximately 5 hours of work, I've now finished drilling
them main spars, and cutting their bushings to size. Bushings will
hopefully be placed, and epoxied in place tomorrow, and the trailing spars
will be drilled for bushings and their 3/8's bushings cut. |
5 |
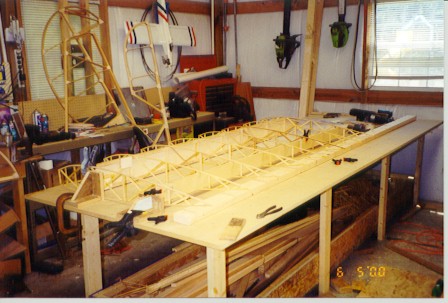
6/5/2000
 |
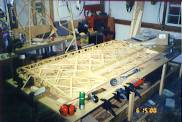
Spar drilling was finished, and all but one remaining
bushing was cut from stock. 3/8th's
stock was short about 1/4" for the need. Lower right wing was
set up on table and ribs arranged. Spars squared and secured in place.
A few ribs were glued to spar, but lack of clamps prevented any major amount
of work being done. May reset jig
tomorrow as per FFP's recommendation |
4 |
6/7/2000
 |
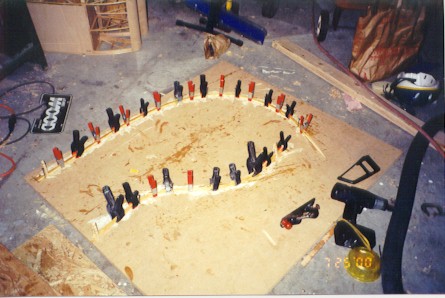
Picked up a dozen or so clamps today.
Probably won't be enough but a start. All ribs were attached to main
spar by glue at top. Trailing edge glued to ribs at wing root and
first two rib bays. Presently researching wing walk, compression
struts, and geodetics arrangements. Possible conflict between geodetics
and wing walk structure, has me baffled. |
3 |
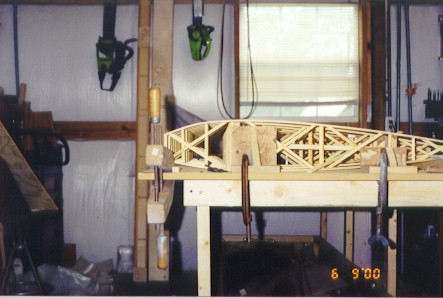
6/8/2000
 |
Remaining trailing edge material was glued
in place. Compression struts also were fashioned and glued into place.
Further corner blocks, and ply gussets will be installed tomorrow. Talked
with FFP and have answers on how to place geo's in wing walk area. Decision
also was made to move the wing walk and "door" to cockpit also will be
moved to port. |
1 |
6/9/2000
 |
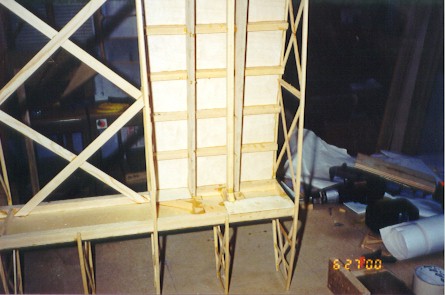
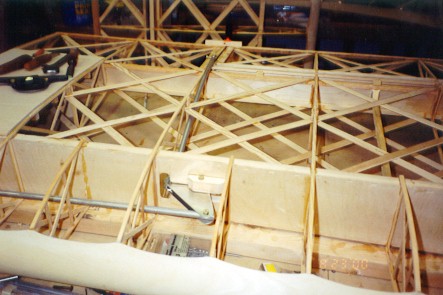
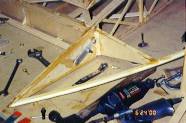
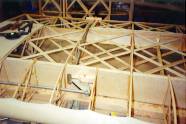
Final installation of compression struts completed.
Once glue sets up, geo'd installations will begin. All geodetics on the
top side of the wing were installed and braced at mid rib as per plans.
After glue was set the wing was lifted, turned over and secured inverted
for the installation of Geodetics on the bottom side. Tomorrow's
goal will be to finish the bottom side geodetics. |
4 |
| 6/10/2000 |
All lower geodetics were shaped, and installed.
Amazing how fast things go once you've done it once. The leading
edge false spars and leading edge ribs were also glued to the front of
the ribs. |
3 |
| 6/12/2000 |
The root rib reinforcement was installed on
the lower side. Rib 1/4" ply, reinforcement at each end of the aileron
bay was also installed A jig was built for forming the wing tip bows,
and one was produced for the lower right wing on the table. |
2 |
| 6/14/2000 |
Wing tip bow was trimmed to shape, and installed.
Aileron portion of wing was cut away to prepare the aileron bay area.
All stiffeners for root and tip ribs were shaped and glued in place.
Stiffeners were also installed to short ribs at each end of aileron bay. |
2 |
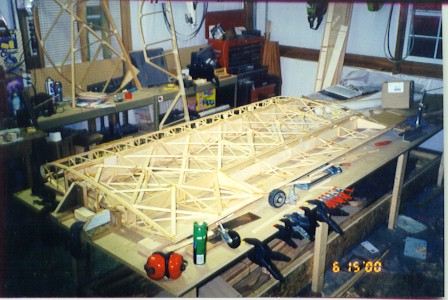
6/15/2000
 |
Further reinforcement of the aileron bay was
completed. Aileron was clamped to table, squared and spar installed.
A few geodetics were also installed to stiffen structure. Aileron
end ribs were aligned and installed also. Ply reinforcement 1/8"
x 1/2" spruce slots were cut as a stack for alignment ease. |
3 |
6/16/2000
 |
Aileron leading edge short ribs were aligned
and slots cut for leading edge reinforcement slats. They were then
glued in place along with the spruce slats. Several more geodetics
were also placed at this time. 1/4" x 3/4" material that borders
aileron bay at top and bottom was reinforced to handle fabric shrinking
loads. Leading edge 1/32 ply attached to top false spar. Once
dry it will be wrapped around and glued to the bottom false spar. |
1 |
| 6/17/2000 |
Leading edge material was glued in place one
side at a time. Ply pieces were places so that their joining scarf,
was centered over a nose reinforcing rib. A few other geodetics were
placed on the aileron also. Preparations are being made to attach
the aileron control horn. |
1 |
6/21/2000
 |
For the last few days I've been just hum hawing
around trying to put off making a decision as to how to do the hinges.
It is now the 25th, and have finally found a way of doing it that satisfies
me. The root hinge point was done exactly as per plans. The
tip rib hinge drawing left much to the imagination. I've pretty much
done things as per plans, but making it so it could be removed through
one inspection plate hole was a challenge. Floating blind nuts were
adhered and riveted to the aileron bay side of the rib. |
2 |
6/25/2000
 |
Today I merely cleaned up the excess glue
drops, and did a touch of sanding. The spar webbing was cut for the
aileron bell crank, and the lay out was checked for reasonable function.
Brass bushings were also created for the aileron bell crank, in stead of
the called out wood spacer between the two bell crank halves. Though
later the aileron bay will have to be trimmed to assure full deflection,
I considered the lions share of this wing complete. |
2 |
| 6/25/2000 |
Pulled out the main and trailing spars for
now the lower left wing. Ribs were slid on, and assembly was clamped
down for alignment. Some warp found in both main and trailing spars.
All parts are now held in place straight, and will be allowed to relax
before major work begins. |
1 |
| 6/26/2000 |
Well once you've done it once, it all falls
together in a hurry. In a matter of 5 hours I've accomplished nearly
half of the lower left wing, including geodetics, and the wing walk region.
Geodetic reinforcement tabs at mid ribs is all that is left on this side
of the wing. They will be place tomorrow, a.m. and then the wing
will be turned over. |
5 |
6/27/2000
 |
Well things never seem to go as smoothly as
you see in foresight. Final rib, to geodetics tabs were installed,
along with the wing walk 1/4" ply surface installed. However,
By 2000, the wing was turned over, and all geodetics installed, awaiting
the tabs between the rib caps, and geodetics only. Leading edge false
spars were installed. Wing tip bow was also laminated during the day. |
4 |
6/28/2000
 |
Today's work was extensive, but in the final
assembly of a wing, a lot of work seems to show little results. The
lower left wing is finished at this point, but aileron work is merely just
begun. The ailerons for some reason really can be time intensive,
since there are so many parts, they have to be done in a certain order,
and alignment is critical. Regardless, another full day's work will
bring this wing to a finish. Then upper wings! |
4 |
| 7/2/2000 |
After returning from a trip, I finished up
the aileron bay's, and put the 1/4" end ribs on the ailerons. Tomorrow,
I'll start putting the geodetics in place on the ailerons, and wrap the
leading edge material around the nose ribs on the left wing. |
1 |
| 7/3/2000 |
Geodetics were placed on the aileron. End
rib stiffeners also added. Aileron is ready for hardware |
1 |
| 7/17/2000 |
Finally some time was made to do a bit of work on
the Youngster. Though no glue was used, the left aileron was rigged
with hardware, hinge and horn installed. Leading edge material is
still not finished, maybe Thursday |
2 |
| 7/21/2000 |
Finally got the leading edge material wrapped and glued
on the lower left wing. Tired of looking at it, and set it aside.
Picked out spars for upper right wing and laid them out on the table with
their 9 ribs. I then place the spar end blocks at the 2 1/8" stagger
to provide the wing sweep back. May find time to do some work tomorrow. |
1 |
| 7/21/2000 |
Well today I did get a good start on the upper
wing. After about the first hour of alignment, and securing
of the main spars, I was able to start the next step which is the compression
struts. There are four in this wing, and the placement of one is
actually called out on the plans. If I place it where the measurement
is called out, The front of it will be placed exactly in the middle of
the interplane / flying wire attach points! Trying to find out if
it's placement is critical or not at this point. I'll call somebody
tomorrow. |
2 |
| 7/22/2000 |
Today I was a bit short on motivation
today. For some reason the the compression struts are always more
difficult than they would seem. Trying to hold them in place along
with the corner gusset blocks can be quite the challenge. All the
top rib cap strips were glued to the spars today, and about half of the
false ribs. All four compression struts were installed and blocked
properly. All geodetics for the top side of this wing panel were
cut to shape and length, sanded and are ready to install. Beginning
to wonder if I'm going to have enough Geo material to finish the last wing
panel. Two pieces of trailing edge material were cut for splicing
purposes. If I get the time tomorrow will be a major gluing and achieving
day. |
3 |
| 7/24/2000 |
As you can see, I didn't manage to make
it to the garage on Sunday. We did achieve a lot at church and the
fellowship that surrounds it. However, this evening I did get out
there for about 45 minutes. All top side geodetics were glued
in place, remaining false ribs, and the trailing edge material was also
glued. Hope to attach trailing edge, and glue geo to rib mount tabs. |
1 |
7/25/2000
 |
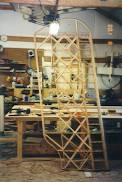
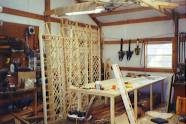
Today was spent preparing the wing tip
bows, for this wing panel, along with the bow that makes the cutout to
ease pilot entry. Learned something today about laminating bows.
About an hour after the glue set on the bows I removed them from the jig
to make sure they would break free. While I had them out, I did a
quick dry fit of the entry bow, and saw that it would work quite well.
So I continued working on the area, removing rib parts, to mount the support
ribs for this bow. Again attempting a dry fit of the parts, I could
no longer achieve as good of a fit! Yes the bow was changing shape.
So I go back to my old way of doing bows. After you break it out
of the jig, return it to the jig and leave it alone for at least 24 hours!?
Tabs between geodetics and ribs were also installed. Trailing edge
was glued in place, ready to receive the top wing entry bow. Top side geodetic
to rib cap pieces were also installed to end the day's work. |
1 |
| 7/27/2000 |
Went out this afternoon and pulled the wing
up from the table and tuned it over to do the underside geodetics.
After much study and measurement, I again clamped the structure to the
table. Top wing entry bow was also glued to the trailing edge, and
to the former at the second rib. Tomorrow, I'll get the geodetics
done on this side. |
1 |
| 7/28/2000 |
As planned, I did get the geodetics done on
the bottom of the wing panel. Tabs attaching geodetics to rib caps
were also installed. Remaining two formers for top wing entry bow
were also installed, along with their triangular corner blocks. Single
geodetics were installed in second trailing rib bay, as well as final trailing
rib bay , to add stiffness. These were not called out in the plans,
but looked like a reasonable modification. Tomorrow starts the leading
edge, and root/tip rib reinforcement. Another good day's work should
do it for this wing, but we all know how that goes. |
2 |
7/31/2000
 |
Today I installed the false spars and leading
edge rib formers. Leading edge ply was also installed this evening.
Rib stiffeners at root and tip ribs are yet to be completed. Hope
to get started on the FINAL wing tomorrow. Just for grins I
had to go out to the shop this evening and place the final spars on the
table! About another 2 weeks and I should be on the fuselage! You
will notice that just inside the tip rib, and one bay inside the root rib,
I've put a diagonal geodetic to the trailing edge. This was not called
out in the plans, but I felt it would help stabilize the trailing edge.
The ones towards the root will be visible through the fabric due to the
shape of the cockpit entry bow. Good place for hind site I guess. |
2 |
| 8/1/2000 |
Well work on the final wing panel started today in earnest. All
ribs were glued in place at the top spar cap, and compression struts fitted.
I ran out of time at that point and will have to continue gluing in the
final two compression struts tomorrow. |
3 |
| 8/3/2000 |
Compression struts, gusset blocks and doublers
were installed today. May add some doublers to the aft area tomorrow.
Looks nice, and can't hurt the strength. all geodetics were cut for the
top side of the wing. They will be sanded and installed tomorrow
morning. Trailing edge stock was spliced and cut to fit, this too will
be glued in place tomorrow. Other plans for tomorrow will be the
lamination of the wing tip, and cockpit entry bow for this wing. |
1 |
| 8/4/2000 |
Ok, so not everything went to plans!
I did get the geodetics in place, and the trailing edge. Though I
laid out the material for the tip and entry bows, I didn't get around
to spreading any glue there. So, we'll try to get to that and the
tabs between the geodetics and rib caps for tomorrow. Then, I'll
turn wing over and start again! This could get old. |
1 |
| 8/5/2000 |
I did get the wing tip bow, and entry bow
laminated. All rib to geodetic tabs were installed. Will turn
wing over and start geodetics on monday. |
2 |
| 8/7/2000 |
Wing has been turned over and reattached to
table. All geodetics cut, sanded and glued in place. Entry bow and
supporting ribs were also glued in place. Trying to find enough material
to finish the leading edge false spars, and end rib reinforcement.
Will scavenge a bit of material from the fuse kits to get us by for a while.
Next work period is the leading edge, wing tip, and tabs between rib caps,
and geodetics. |
2 |
| 8/11/2000 |
First off I glued tabs in place and
a few stiffening reinforcement geodetics for the trailing edge. When
dry, I glued in leading edge false spar, and short riblets. All leading
edge material was planed to shape, and is ready to accept leading edge
1/32 ply. Rib end stiffeners were cut to size, and will be soaked
and installed in the morning. I had to steal nearly 20 feet from
fuse F47 stringer parts. I'll make it up later somehow. |
2 |
| 8/12/2000 |
Lots of work, seemingly nothing accomplished.
All rib and tip root reinforcements were installed, to fourth and 3rd
wing panels. Leading edge ply was attached to top of false spar,
should wrap it around and glue to lower false spar tomorrow. Two
top wings were inspected and any gaps in leading edge material to riblets
were filled using 50% glass balloons slurry. Small crack in leading
edge material was also filled with same from behind and planed and sanded
down to proper contour. Rest of time was spent doing little detail
clean up, trimming, gap filling, cutting scallops, sanding etc. . . .
Is there light at the end of this tunnel yet? |
3 |
8/15/2000
 |
Again it seems that work has interfered with
my best laid plans. This morning I did finally get around to rolling
the final leading edge on the the final wing panel, so next opportunity,
I'll start the detail clean up on the next work period. I will be
working with the aileron rigging on the lower left wing also. |
1 |
8/17/2000
 |
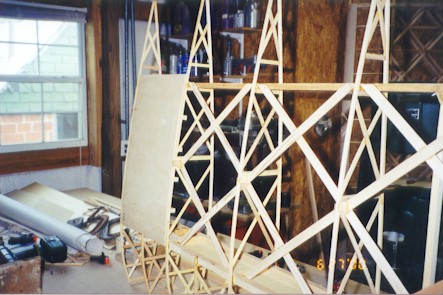
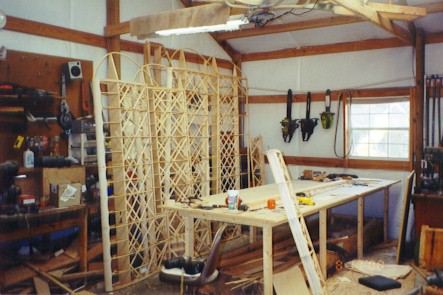
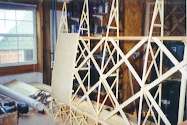
Does it ever end? I've spent approximately
4 hours so far on the wings today, and see only modest progress.
All the scallops have been cut in the leading edge ply, and a few doublers
for the aft end of the compression struts (cosmetic only) have been installed.
Preparations for the leading edge ply on the ailerons has also been started.
Lower left wing spar was cut out for aileron bell crank installation.
Looking at all four wing panels lined up against the wall kind of make
it look like I got a Trellis project confused with my aircraft building
goal! |
4 |
| 8/21/2000 |
Continuing the clean up of the wood structure on
the wings, brings back a debate I've had on the other airplanes I've built.
Other than sanding, any other preparation for paint, will cause weight.
I'm not building a show winner, but want the fun and performance that a
built to plans, and light aircraft can provide. Aileron bellcranks
were assembled, as were the wood/ply blocks that will support them.
Aileron pushrod material was found and removed from the box. |
2 |
| 8/22/2000 |
Wood dowels were placed in Aileron to bellcrank
pushrods at aileron end and epoxied in place. The 9/64ths slot was
cut to receive the aileron horn. By some time tomorrow these things
may even work!? |
1 |
8/23/2000
 |
1600, the ailerons work! Bellcranks
were installed in-between their mount blocks with a washer on both sides.
The base of the blocks were then checked to assure a flat overall surface
to glue to the 1/6" ply webbing. Once dry, pushrod from bellcrank
to aileron was bent to accommodate full travel as per plans. Then
ailerons were placed a full down travel and the 3/4" x 3/4" vertical brace
was glued in behind the spar to support the bellcrank assembly. Pushrods
that then travel to the control stick in the cockpit were drilled at one
end, but no more will be done to them until control rigging at assembly.
Tomorrow's operations will mainly consist of prepping the wings for varnish.
Sand paper time! Also a great amount of time will be spent cleaning
up the shop preparing for the construction of the fuselage. |
4 |
| 8/24/2000 |
Ailerons were removed and great time was spend
truing up the leading edges to receive the ply with uniformity. Listening
to people now trying to get the best way to do the glue operation on the
ply. |
1 |
8/26/2000
 |
Insides of the aileron leading edges were
varnished and left to dry while I was away. |
1 |
8/28/2000
 |
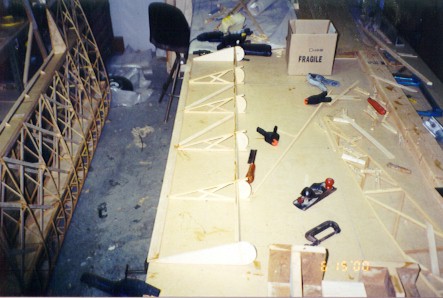
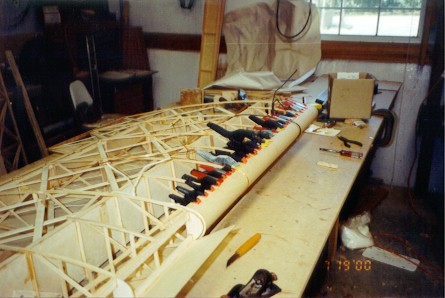
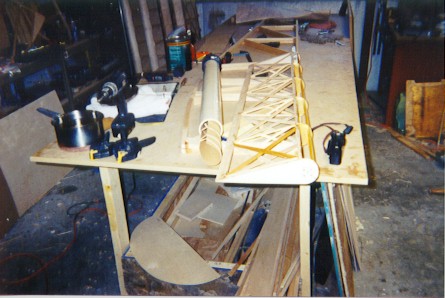
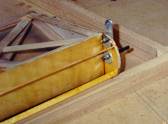
Aileron control horns were installed on both
ailerons. Areas where epoxy would be adhering was inspected to assure
bare wood was available for best joint. Aileron leading edges were
also soaked and bent in preparation of the gluing operation to the leading
edges of the ailerons. You can see them rolled inside the 4" sewer
pipe to the left of the aileron on the table. Ply was removed from
tube and dried wrapped in rubber bands to hold shape. Ply pieces were then
coated inside with epoxy to protect from weather, and then glued to leading
edge of aileron. It will be unwrapped, cleaned up and trimmed tomorrow.
Then the work on the final aileron will be prepared. |
1 |
8/29/2000
 |
The last aileron had its leading edge material
applied successfully today. Will take a bit of clean up tomorrow,
but has already been placed on the wing for my own enjoyment. Got
to see progress where ever you can get it! |
1 |
| 9/28/2000 |
Returned to the wings today to prepare the
lower ones for initial rigging. Bushings and attach plates were installed
on both lower spars, so the wings could be installed on the fuselage, and
rear carry through spar installed. |
1 |
| 11/6/2000 |
Much time was spent today performing the final
installation of the wing attach, flying wire, and interplane strut attachment.
I've finished two of the wing panels, and should be able to finish the
remaining two in the morning. Looking at the possibility of rigging
the wings on the 8th of this month. Doing a trial fit of the upper
wing this evening revealed a bit of work may be in order. . . |
3 |
| 11/7/2000 |
Final wing attach, flying wire/interplane
strut attachments were installed today. Area around fuselage was
cleaned in preparation for fitting of the wings tomorrow. This will
pretty much conclude this section about the wing construction. Things
will now move to the final rigging, and covering. |
1 |